
VidOtter
A cross-platform browser-integrated media downloader using a Chrome/Edge extension and local Go Bridge for video/audio detection, downloads and processing.
VidOtter
1. Introduction
I started VidOtter because I wanted a simpler way to download videos playing in my browser.
Many websites do not provide direct download links. They use temporary playback URLs or stream videos through HLS playlists and multiple segments. A page can play a video without exposing a downloadable file.
I did not want to build a separate extractor for each site, because it would need constant maintenance whenever a website changes. The browser already requests the media during playback, so detecting those requests is a simpler and more general approach.
VidOtter uses a browser extension to detect MP4 and HLS resources, then passes them to a local Go download engine for downloading and file merging. It does not rely on site-specific extraction rules.
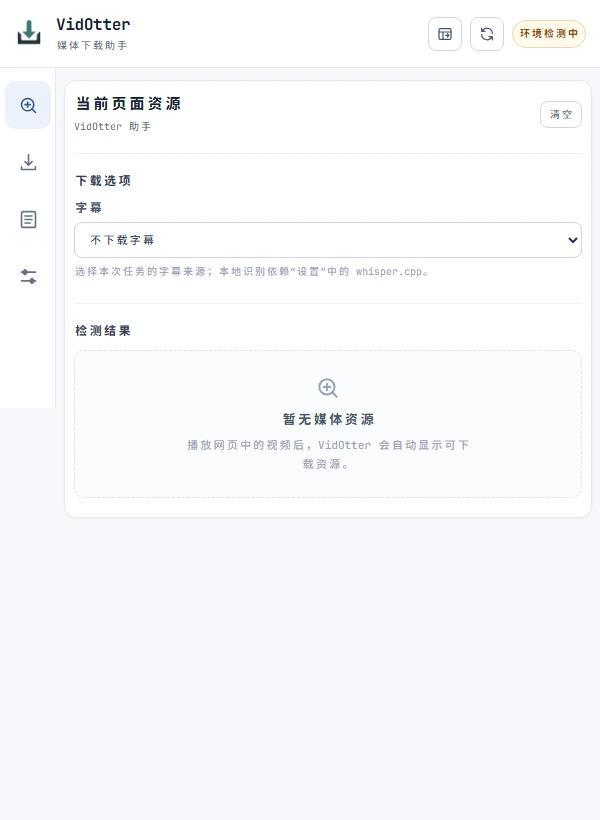
Play a video in Chrome or Edge, open VidOtter, and download a detected resource. Manage jobs, progress, and history through the popup, side panel, or full-screen workspace.
VidOtter also offers optional site captions, local speech recognition, subtitle translation, and ChatGPT MCP integration. Normal video downloads do not require AI models, a ChatGPT account, or API keys.
Installers are available for Windows, Linux, and macOS.
2. Quick Start
Install VidOtter, enable the browser extension, and download a sample video.
2.1. Install
Download the installer for your system from the latest Release. The graphical installers support Windows x64, Linux x64, and Intel macOS.
2.1.1. Graphical Interface
Windows
Run VidOtter-Setup-v*-windows-amd64.exe and follow the installation wizard. After installation, use View Setup Instructions from the Start Menu to load the browser extension.
macOS (Intel)
Open VidOtter-Setup-v*-macos-amd64.dmg and launch the installer application inside. Follow the wizard, then use the setup instructions to load the extension. This installer is for Intel Macs; Apple Silicon can use the macos-arm64.tar.gz archive.
Linux (x64)
Run VidOtter-Setup-v*-linux-amd64.run in your desktop environment. If your system blocks execution, allow it in the file properties or run chmod +x on the file. Follow the wizard and load the extension from the installation directory.
All three installers register the local Native Messaging host. Chrome or Edge starts the local Bridge when needed.
2.1.2. Command Line
These commands run the same graphical installers without the wizard. Open a terminal in the directory where you downloaded the installer.
Windows (PowerShell)
$installer = (Get-ChildItem .\VidOtter-Setup-v*-windows-amd64.exe | Select-Object -First 1).FullName
Start-Process -FilePath $installer -ArgumentList '--accept-licenses --default-answer --confirm-command install' -Wait
macOS (Intel)
dmg=$(find . -maxdepth 1 -name 'VidOtter-Setup-v*-macos-amd64.dmg' -print -quit)
mount=$(mktemp -d)
hdiutil attach -nobrowse -readonly -mountpoint "$mount" "$dmg"
app=$(find "$mount" -maxdepth 2 -type d -name '*.app' -print -quit)
installer=$(find "$app/Contents/MacOS" -maxdepth 1 -type f -perm -111 -print -quit)
QT_QPA_PLATFORM=offscreen "$installer" --root "$HOME/VidOtter" --accept-licenses --default-answer --confirm-command install
hdiutil detach "$mount"
Linux (x64)
installer=$(find . -maxdepth 1 -name 'VidOtter-Setup-v*-linux-amd64.run' -print -quit)
chmod +x "$installer"
QT_QPA_PLATFORM=offscreen "$installer" --root "$HOME/VidOtter" --accept-licenses --default-answer --confirm-command install
2.1.3. Manual Archive Installation
If you prefer manual installation, download the matching archive from the same Release:
- Windows x64:
vidotter-v*-windows-amd64.zip - Linux x64 / ARM64:
vidotter-v*-linux-amd64.tar.gz/vidotter-v*-linux-arm64.tar.gz - macOS Intel / Apple Silicon:
vidotter-v*-macos-amd64.tar.gz/vidotter-v*-macos-arm64.tar.gz
Extract it to a permanent location. The installation root contains bin/ and extension/. Register the Native Messaging host from that directory:
Windows PowerShell:
Set-Location 'C:\path\to\VidOtter'
.\bin\vidotterdev.exe install
Linux/macOS:
cd '/path/to/VidOtter'
./bin/vidotterdev install
If you move the installation, run the registration command again. On Linux, uname -m reports x86_64 for x64 or aarch64 for ARM64. On macOS, check the chip in About This Mac.
2.2. Configuration
2.2.1. Browser Extension
- Open
edge://extensionsin Edge orchrome://extensionsin Chrome. - Enable Developer mode and select Load unpacked.
- Select the installed VidOtter
extension/folder, which directly containsmanifest.json. - Open VidOtter from the browser toolbar’s extensions menu; optionally pin it to the toolbar.
- Go to Settings → Connection & runtime and confirm Browser and download service connected before downloading.
If the Native Messaging host cannot be found, copy the 32-character extension ID from the extensions page and register it again from the installation root:
# Windows: replace the placeholder with the actual extension ID
.\bin\vidotterdev.exe install --extension-id YOUR_32_CHARACTER_ID
On Linux/macOS, use ./bin/vidotterdev install --extension-id YOUR_32_CHARACTER_ID. Reload VidOtter on the extensions page afterward.
2.2.2. Download Settings
download.output_dir: output directory; defaults toData/downloads/.download.concurrent: download concurrency; defaults to32, valid range1–64.download.quality: automatic by default; also acceptsbestor a source-supported height such as720.proxy.enabled,proxy.url: proxy disabled by default; HTTP proxies are supported, proxy credentials and SOCKS are not.interface.language: interface language; defaults tozh-CN, also acceptsen.interface.open_mode: defaults topopup, also acceptssidePanel.
Before manual edits, back up the configuration and stop the Bridge; restart it afterward. Preserve the complete file rather than replacing it with a snippet.
2.2.3. Upgrade and Uninstall
Pause jobs and back up Data/, then follow your installation method:
- GUI installer: use VidOtter Maintenance and follow the matching Release’s upgrade instructions. If no online update feed is configured, remove the old program through Maintenance, then run the new installer.
- Archive: replace
bin/,extension/, and packagedtools/with files from the same new release. RetainData/, register again, and reload the extension.
Program uninstall preserves data and downloads; back them up before manually deleting the installation folder.
To unregister a manual installation, run .\bin\vidotterdev.exe uninstall on Windows or ./bin/vidotterdev uninstall on Linux/macOS, then remove the browser extension.
2.3. Verify the Installation
Open the MDN CC0 sample video and start playback.
Stay on that tab and open VidOtter:
- Find the MP4 in Detect.
- Select No subtitles.
- Click Download.
- Open Downloads and find the new job.
For HLS, select the complete playlist rather than an individual media segment.
Wait for Completed, expand Downloaded file in the job, and click Open beside the file. Confirm that it plays. You can also open it directly in the default output directory, Data/downloads/ under the installation root.
For the full-screen interface, select Open workspace in the extension.
2.4. Connect to ChatGPT (Optional)
VidOtter includes a local MCP server. The Tunnel is only needed for ChatGPT on the web; downloading videos or using a local MCP client does not require it.
- Create a Tunnel ID and a Runtime API Key.
- Open VidOtter → Settings → External components → ChatGPT MCP and install the Tunnel Client if prompted.
- Enter both values and click Save, then Start Service. The service connects automatically when Connect Tunnel automatically is enabled; otherwise, click Connect Tunnel.
- Register and authorize the same Tunnel ID in ChatGPT Plugins.
- Select VidOtter in ChatGPT and call the read-only
vidotter_statustool.
Start local service at login and Connect Tunnel automatically are independent settings. Saving does not change a running service; use Restart Service to apply saved connection changes. Disconnect Tunnel keeps the local service running, while Stop Service stops this run without disabling its next-login startup preference. Saved keys are masked and do not need to be entered again.
The service is managed by Go on all three platforms: Windows Task Scheduler, Linux systemd user units, and macOS LaunchAgents. The old PowerShell/Shell-based MCP service settings are not imported; enter the connection details again after upgrading to v1.7.0. Downloads and other user data are retained.
For command-line status and service control, run the installed Bridge with --mcp-service status|start|stop|restart|connect|disconnect. For example:
.\bin\vidotter-windows-amd64.exe --mcp-service statusOn Linux use ./bin/vidotter-linux-amd64 (or linux-arm64); on macOS use ./bin/vidotter-macos-amd64 (or macos-arm64). The graphical settings page is the simpler way to enter credentials.
A connected local Tunnel does not mean ChatGPT has authorized the plugin. Check both independently.
2.5. Subtitles and External Components
MP4/HLS uses the built-in downloader. Install yt-dlp through Settings to resolve other supported webpages; FFmpeg is required for HLS merging and audio/video muxing. DASH and separate audio/video support depend on the source and available tools.
Choose the workflow that matches the subtitle source:
- Site captions: requires yt-dlp and captions available from the source.
- Local speech recognition: requires FFmpeg, whisper.cpp, and a speech model.
- Subtitle translation: requires llama.cpp and a translation model; specify the spoken language when using speech recognition output.
Check the required tools under Settings → External components and install or configure any missing ones. For local recognition and translation, select and download a model or set the path to an existing one. Once ready, return to Detect, select a subtitle workflow, and download. Check the resulting subtitle files, text, and timestamps.
If ChatGPT already has a Remote Browser Tool connection, reuse it for page actions and use VidOtter for media discovery and downloads.
To control the browser through VidOtter instead, install the Remote Browser MCP component in Settings. It uses an independent release package and is limited to controlled background tabs. Enable interactive clicking explicitly on the local machine if needed; no second Tunnel is required.
2.6. Troubleshooting
- The extension cannot connect: check the extension ID and repair registration as described in 2.3. If it still fails, inspect
Data/logs/and check whether port127.0.0.1:17891is occupied. - No video is detected: play or seek in the original tab to trigger a fresh media request. Some websites expose no downloadable MP4/HLS or use DRM.
- HTTP 403 or an expired URL: replay the original page to refresh the media request, then follow the job’s instructions to resume or download again.
- HLS muxing fails: check FFmpeg availability. For subtitle failures, select No subtitles first and verify the basic download.
- An old version remains, or an action reports unsupported Tool operation: stop the old Bridge, update the program files, reload the extension, and compare the version in Settings → About.
If these checks do not resolve the problem, open an Issue with the VidOtter version, operating system, reproduction steps, and sanitized error information. Do not attach the complete Data/ directory.
3. Development
Development requires Git, Go, and Node.js. Use a Go toolchain satisfying bridge/go.mod and tools/vidotterdev/go.mod, and the Node.js version in the CI configuration.
3.1. Open and verify the project
git clone https://github.com/ThinkerQAQ/vidotter.git
cd vidotter
go -C tools/vidotterdev run . verify
go -C tools/vidotterdev run . build
verify runs tests for both Go modules, extension JavaScript syntax checks, and script tests. Success prints Go and browser checks passed. build compiles the current platform’s Bridge into .build/out/; see 3.2 for a development installation.
For example, cross-compile for Windows:
go -C tools/vidotterdev run . build --os windows --arch amd643.2. Install a development version
From the source repository root, run these commands to deploy into .build/dev-install/ and register the service:
Linux/macOS:
vidotter_dev_dir="$PWD/.build/dev-install"
go -C tools/vidotterdev run . deploy --target "$vidotter_dev_dir"
cd "$vidotter_dev_dir"
./bin/vidotterdev install
Windows PowerShell:
$vidotterDevDir = Join-Path (Get-Location).Path '.build\dev-install'
go -C tools/vidotterdev run . deploy --target $vidotterDevDir
Set-Location $vidotterDevDir
.\bin\vidotterdev.exe install
Follow 2.2.1 to load this deployment’s extension/, then complete 2.4–2.5 to download and check a file. Change back to the original source repository root before further source work or packaging.
3.3. Packaging and CI
Use tools/vidotterdev/ for builds, verification, and packaging. Formal packaging uses go -C tools/vidotterdev run . package and requires verified sidecar tools, license materials, and the pinned FFmpeg source archive. --allow-missing-tools is for incomplete development bundles only.
CI runs tests, builds, and README link checks on Windows, macOS, and Linux. Real browser downloads and GUI installer interaction require separate acceptance testing. See AGENTS.md for contribution rules.
4. License
Original project code uses Apache-2.0. Third-party components retain their respective licenses; see NOTICE and THIRD_PARTY_NOTICES.md.
VidOtter provides media discovery and download capabilities. It does not bypass DRM, paywalls, or access controls. Download only content you are authorized to save, and follow applicable laws and the media source’s terms.
Drag to pan, scroll to zoom, and click a node to expand or collapse it. Large maps start with deeper levels collapsed; click nodes to expand them.