
NOTE
1.11 Elasticsearch Installation
English translation of the original VNote ‘Elasticsearch Installation’, preserving its structure, commands, and historical setup notes.
This is a historical learning note and may contain outdated or incomplete understanding.
1. Standalone Version
1.1. Download and Install Elasticsearch
1.2. Download and Install Kibana
1.3. Chrome Management Plugins
2. Cluster Version
2.1. Download Elasticsearch
2.2. Extract Three Folders
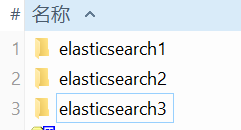
2.3. Create data Folders
mkdir -p elasticsearch1/data
mkdir -p elasticsearch2/data
mkdir -p elasticsearch3/data
2.4. Modify the Configuration
- es*
cluster.name: myes
node.name: es1

# Whether the node is eligible to become a master node
node.master: true

# Whether this is a data node
node.data: true

# Data and log paths
path.data: <USER_HOME>/software/es/es6/elasticsearch1/data
path.logs: <USER_HOME>/software/es/es6/elasticsearch1/logs

# Set the access address and port
network.host: 0.0.0.0

# Configure the access port
http.port: 9200

# Cluster address settings
discovery.zen.ping.unicast.hosts: ["localhost:9200", "localhost:9201", "localhost:9202"]

# To prevent a cluster split-brain situation, i.e. one cluster splitting into multiple clusters,
# the minimum number of master nodes usually needs to be configured as
# (number of hosts eligible to become master / 2) + 1
discovery.zen.minimum_master_nodes: 2
2.5. Start
- es*
elasticsearch2/bin/elasticsearch
Discussion
Sign in with GitHub to comment. Discussions are stored as GitHub Issues.View on GitHub